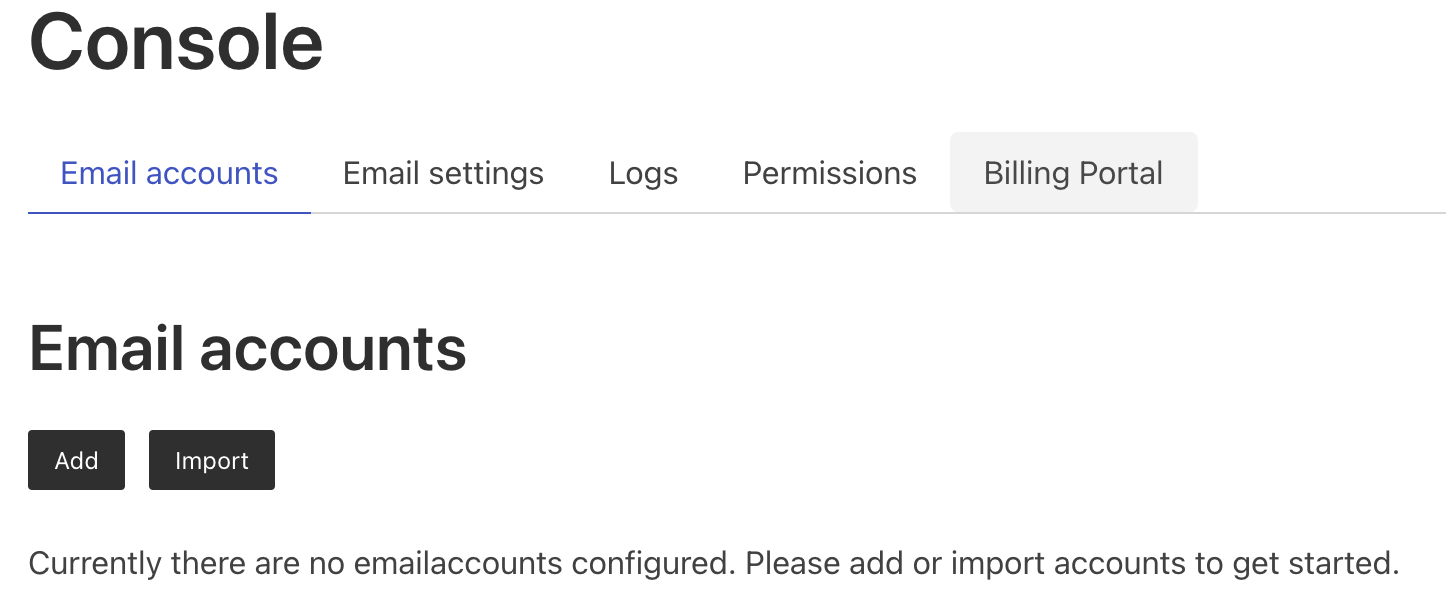
Email accounts
This section describes how to configure emailaccount for which lette.io will act as an imap proxy.
Permissions to import email accounts
The most convenient way to add email accounts to lette.io is to import them from the list of user mailboxes from your tenant. To do so, the lette.io webinterface needs permissions to read your users from Azure Active Directory. To grant these permissions, open the lette.io console and navigate to the permissions tab. The upper table is showing webinterface permissions. Choose the row describing the User.Read.All permission and click on the Consent-link on the right. Sometimes it takes a while until the permission gets granted in the system. If you are receiving a permission denied error while importing emailaccounts after giving consent, please wait a while and log out and back into lette.io.
It is also possible to manually add a list of mailboxes without granting the lette.io webinterface permissions to read your tenant's user details.
Add or import email accounts
To add or import email acconts, click navigate to the console and make sure to select the email accounts tab. You can then either click the Add or the Import button.
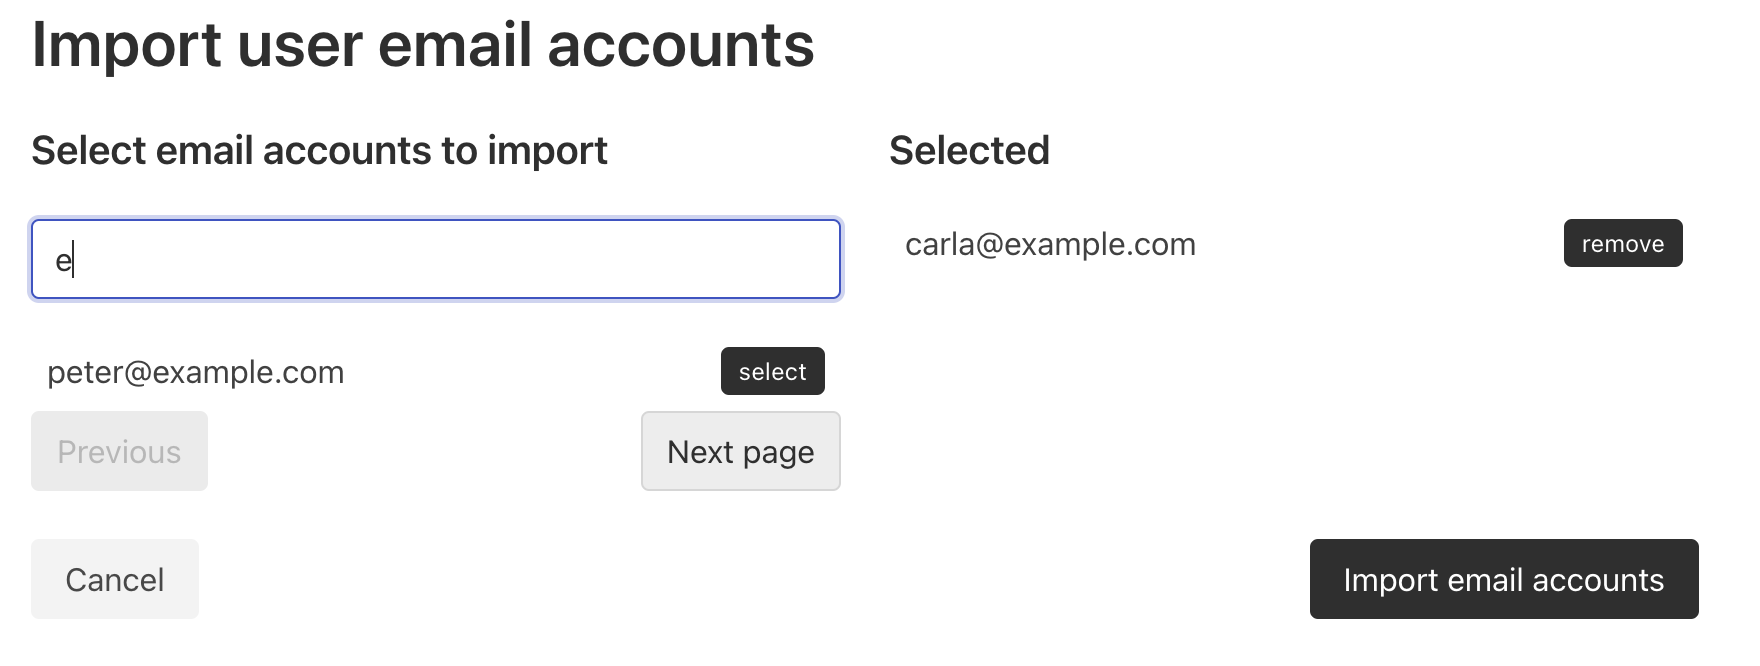
Importing email accounts
To import emailaccounts, select them from the list on the left side. You can filter the email addresses using the textbox above the list.
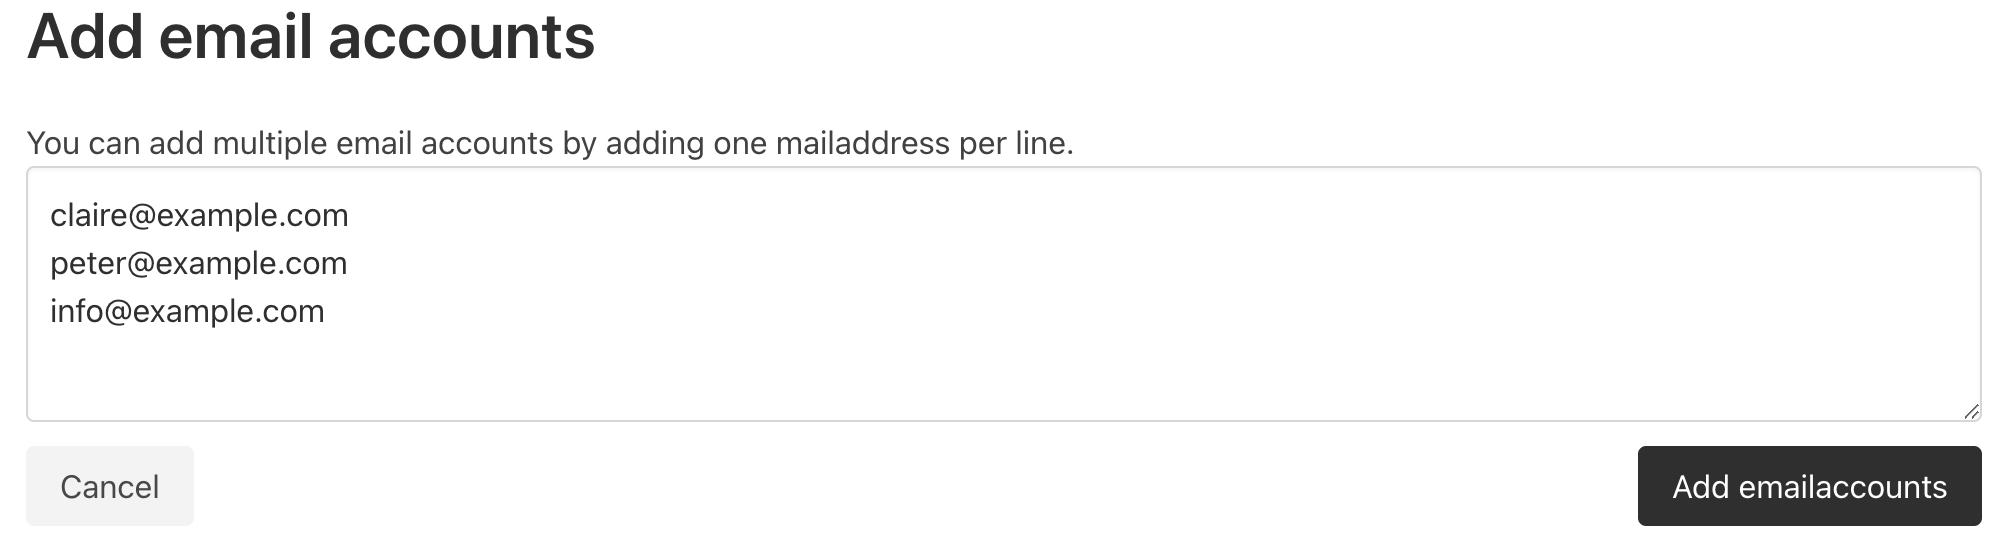
Manually adding email acocunts
It is possible to add a list of email accounts by listing one email address per line.
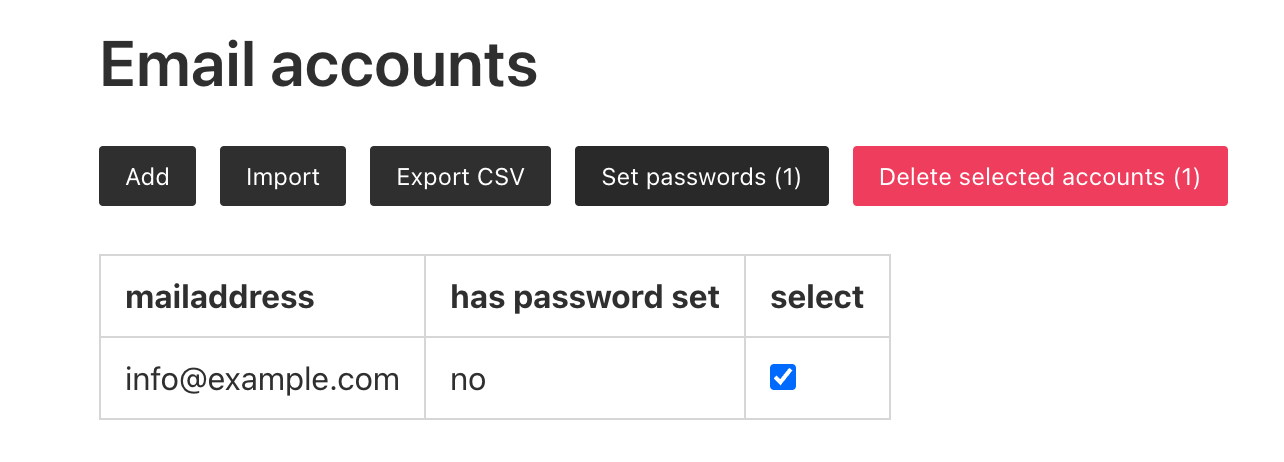
Setting passwords
After adding email accounts, you need to set the passwords which will be used by your email clients to access lette.io. Please note that these credentials are separate from the ones used in Exchange Online. Please select your mailboxes and click the "Set passwords" button above.
Next steps
After configuring your email acounts, you need to grant the lette.io application the required permissions to act as a proxy for Exchange Online.